A birthday cake for me! You will see from the recipe this a light version of the red velvet. There isn’t a large amount of red colouring and sugar. I even read recipes that use up 2 BOTTLES of bake king red for a single cake, there’s only 1 tsp here of Wilton red gel colour.
Cake and frosting adapted from my favourite gurus, Jeannie and Enne Tay.

Recipe ( adapted from Jeannie and Enne Tay)
Red Velvet Cake
- 5 egg yolks
- 30g caster sugar
- 1/4 tsp salt
- 70g oil
- 100ml coffee milk (1 tsp coffee+ 10 ml hot water + milk)
- 1 tsp vanilla extract
- 1-2 tsp Wilton red gel Colour
- 1 tsp Apple cider vinegar
- 80g plain flour
- 10g cocoa powder
- 12g corn flour
- 1/4 tsp baking soda
- 5 egg whites
- 1/4 tsp cream of tartar
- 70g caster sugar
Cream cheese frosting
- 350g cream cheese
- 200g icing sugar
- 75g butter
- 1 tsp sour cream or yoghurt
- 1 drop Wilton red gel Colour
Method
1. Cream egg yolks, sugar and salt till light and fluffy. Add oil slowly in 3-4 portions and whisk with each addition.

2. Add in vanilla extract and coffee milk and whisk further. Then add in the red colouring and Apple cider vinegar.
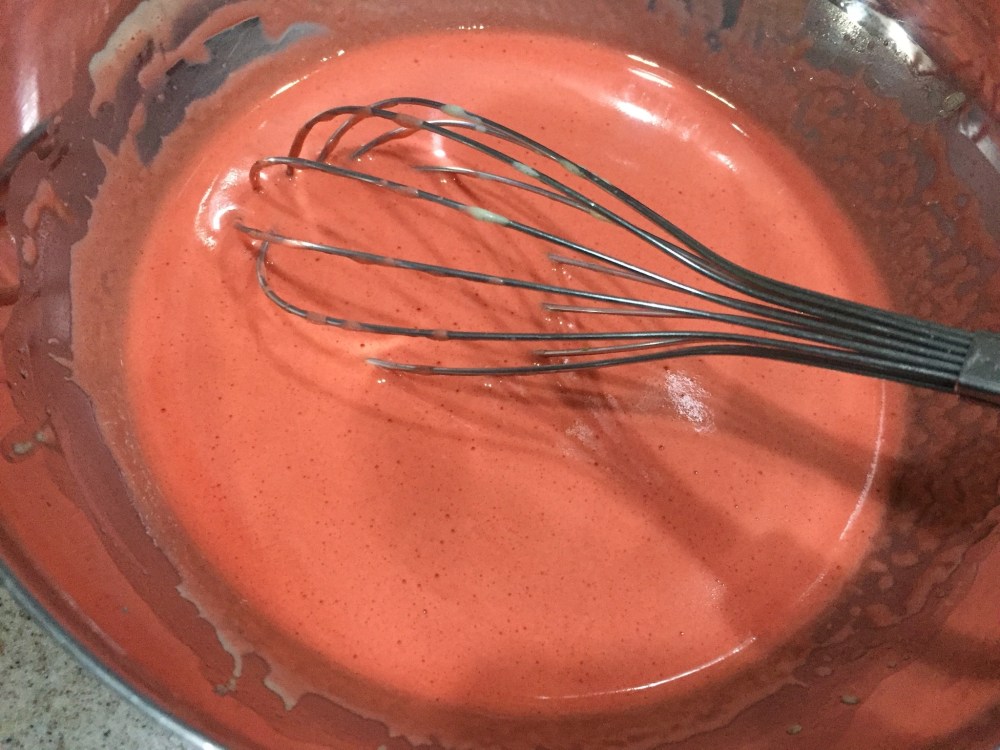
3. Sift all the flour, cocoa powder and baking soda and add in 3 batches. Gently fold till no traces of flour, then set aside.

4. Whipped egg white till large bubbles form. Add in cream of tartar and sugar in 3 batches and whip till firm peak.
5. Add 1/3 meringue to yolk batter to lighten it, then pour yolk batter into meringue and fold gently with spatula till evenly mixed.

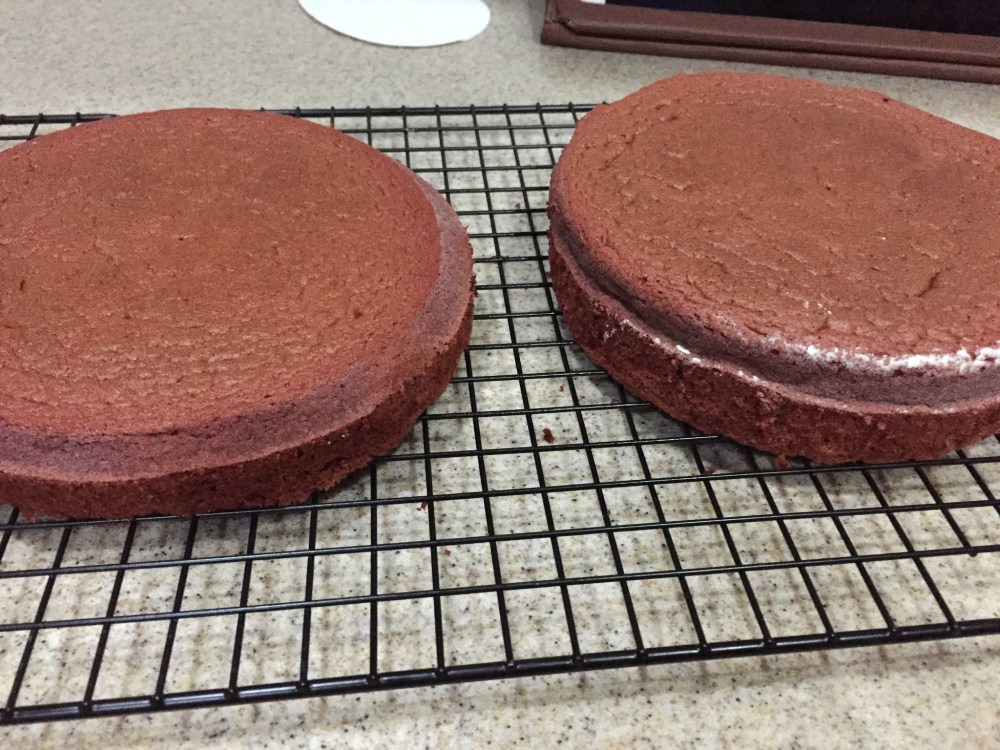
6. Divide batter into 2 7″ baking tin and bake at 165 deg C for 20-25 min. Once done, unmould and cool on rack. When cool to room temperature, wrap in cling wrap and store in the fridge.

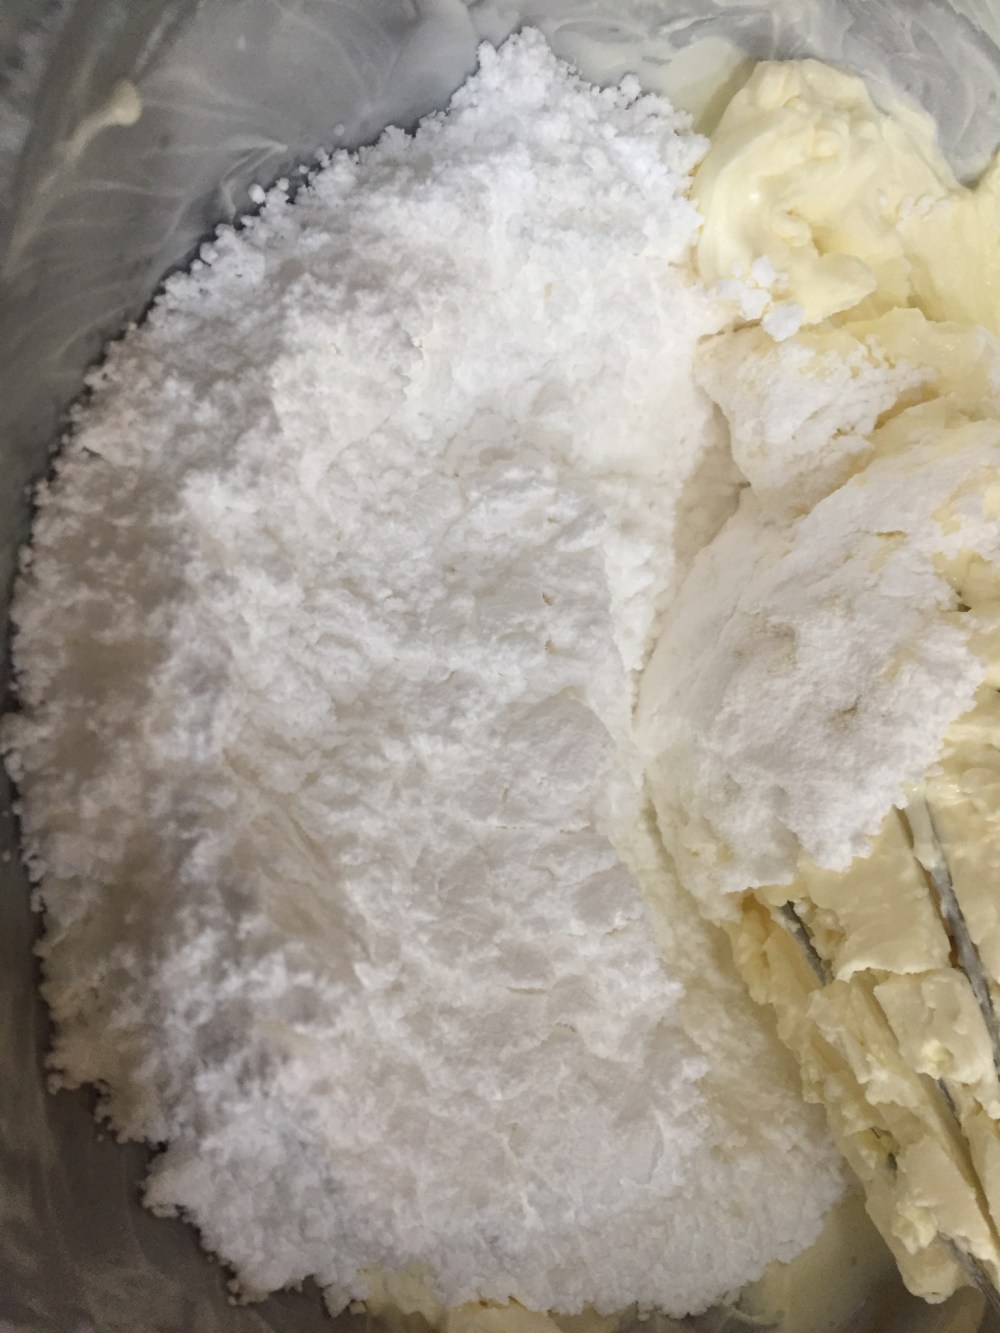
7. Now for the frosting. Cut the cream cheese and butter into cubes and allow to soften.

8. Whisk the cream cheese with the yoghurt and icing sugar till light and evenly mixed. Add in butter and whisk some more. Final texture should look like below.

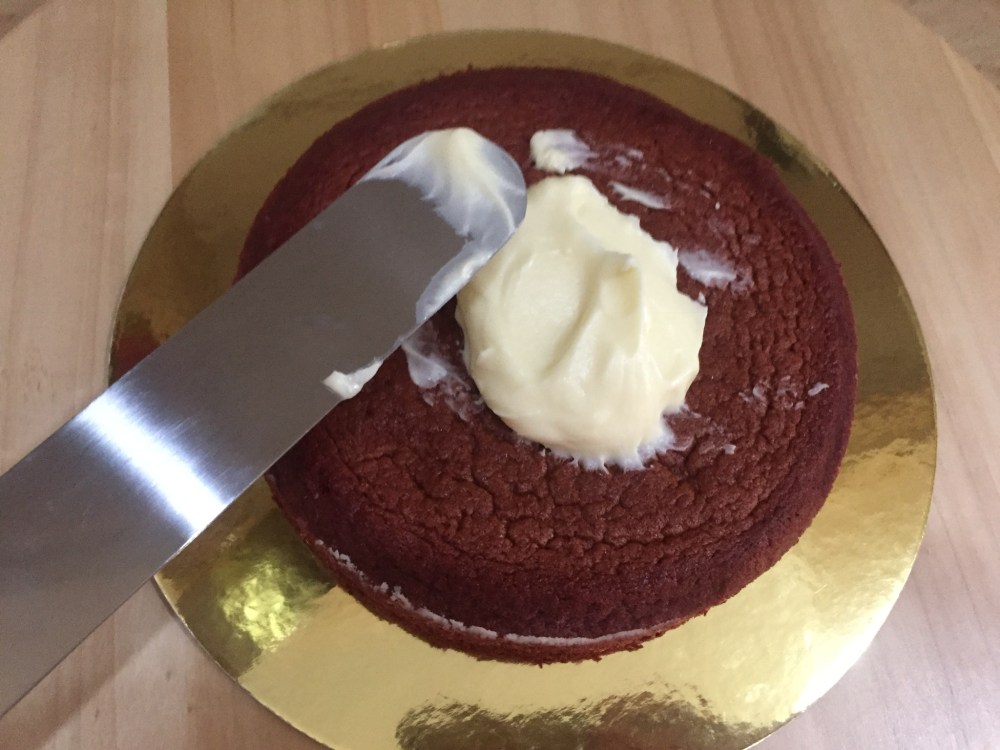
9. Frost the cake, starting by stacking and a crumb coat. Chill for half hour.
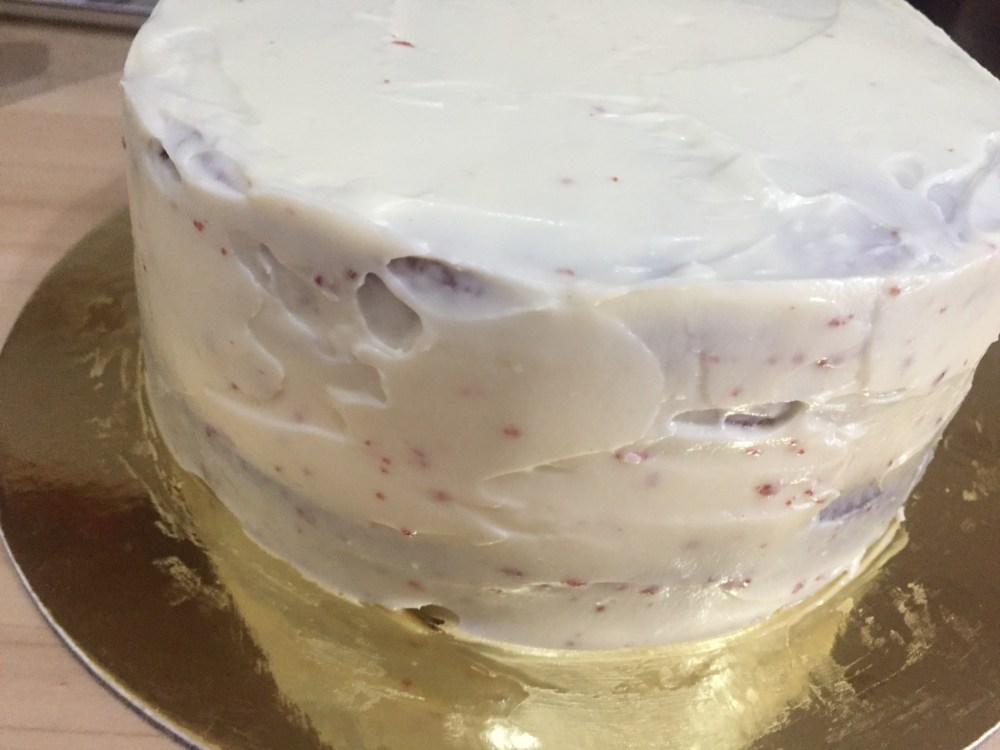
10. Complete the base coat and chill again.

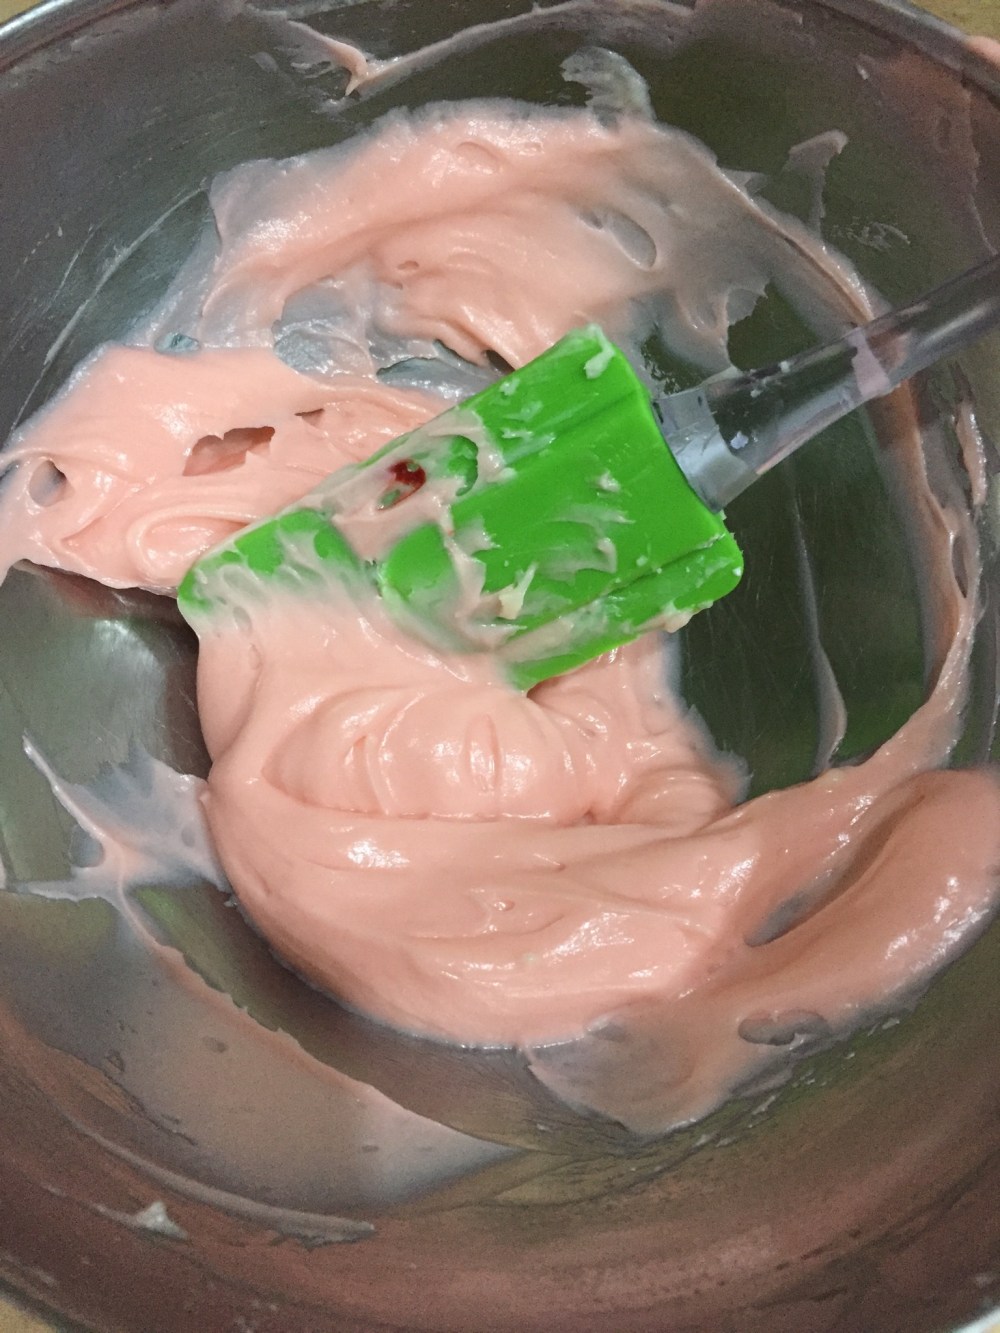
11. With the balance frosting (about 160g is enough), use a toothpick dipped into the gel Colour and make a few dots into the frosting and mix. This will produce the baby pink below. Adjust Colour to your liking.
12. Place in a piping bag and pipe the designs you like. Chill cake again before serving.


